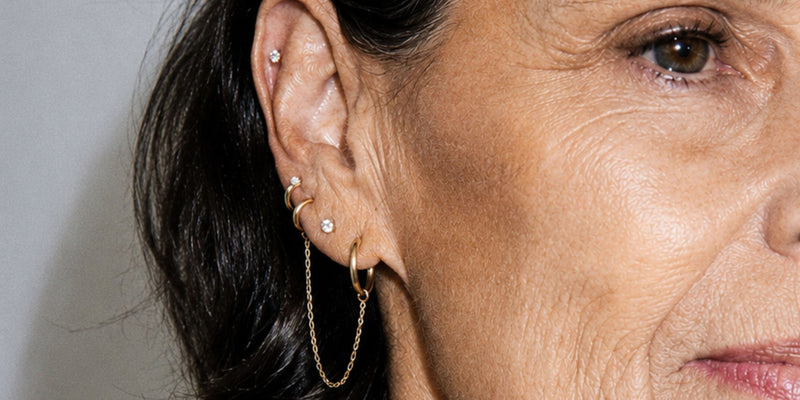
Flat back earrings: how they work, what size you need and how to put them in


Gauge and post length decide how a flat back fits. Here is how to choose yours, put it in and keep the front secure.
I have 18 piercings. Taking my earrings out every night is not happening.
That's why I love a flat back. A smooth back behind your ear, something you love at the front, and no pointy post digging in when you lie down. But the part that makes all the difference is getting the fit right.
Let me walk you through how they work, which measurements matter, and how to get those tiny fronts on without losing your patience.
What a flat back earring is
A flat back has two parts: the post, with its flat back attached, and the decorative front.
The post goes through your piercing from behind your ear. The flat back is part of that same piece. It isn't a separate backing you slide on. The front is the part you see: a diamond, a gold ball, a bezel or whatever you've picked for your stack.
You'll also hear piercers call this style a labret. Same basic idea: a straight post with a flat base behind your ear.
How our flat backs work
Our flat backs are internally threaded. That means the tiny screw is attached to the decorative front, and it screws into the inside of the post. The part that passes through your piercing stays smooth.
Hold the back still and turn the front clockwise, as if you're looking straight at the front of the earring, until it's snug. Gentle is enough. You don't need to tighten it as hard as you can.
Right is tight. Left is loose. Just remember you're looking at the front of the earring.
Once the front is screwed in, the post length sets the space between the front and the back. A butterfly back works differently: it's a separate backing that slides onto a post. With a flat back, there's no pointed end sticking out behind it.
You'll also see threadless flat backs from other brands. Those use a push-fit connection rather than a screw. The instructions in this guide are for our internally threaded style.
What size flat back do you need?
There are two measurements to check: gauge and post length. They tell you different things, and you need both.
Gauge: how thick the post is
An 18G post is approximately 1.0 mm thick. A 20G post is approximately 0.8 mm, and a 16G post is approximately 1.2 mm. The smaller the gauge number, the thicker the post. Annoying, I know.
Check the Size & fit details on the earring you're buying and compare them with the jewelry you already wear. If you're not sure what gauge your piercing is, ask your piercer. Don't force a thicker post through a smaller hole. A thinner post may fit a larger piercing, but it can also change the size that piercing settles to over time.
Post length: how much room your ear has
This is the wearable length between the inside of the flat back and the base of the decorative front. You don't include the back itself or the decorative end in that measurement.
Too long, and the earring can tilt, move around and catch. Too short, and it can press into your ear. The goal is a close, comfortable fit with no squeezing or digging in.
Choosing your post length
You'll see lengths such as 5 mm, 6.5 mm and 8 mm in our range. Here's where to start, from our size guide. Check which lengths are available for your chosen earring.
| Piercing stage | Placements | Post length |
|---|---|---|
| Healed piercings | Lobe, upper lobe, helix, forward helix, conch and tragus | 5 mm to 6.5 mm |
| New or still-healing piercings | All placements | 8 mm |
Size recommendations are a guide only. Fit depends on your piercing placement, healing stage, aesthetic preference and ear anatomy (e.g. lobe and cartilage thickness). Contact customercare@adornmonde.com for assistance or consult your local piercer.
For a healed piercing, a thinner lobe may suit a shorter post, while a fuller lobe or thicker cartilage may need more room. Even two piercings next to each other can need different lengths. Don't assume your conch needs the same post as your lobe.
For a new or still-healing piercing, the 8 mm post allows room for swelling. Your piercer can confirm the right length for your placement.
As the swelling settles, your piercer may recommend a shorter post before the piercing has fully healed. That's downsizing. Leaving an unnecessarily long post in can mean more movement and catching, but changing it too early yourself can upset it too. Let your piercer handle changes while it's healing.
My easiest tip? If you already have a flat back that fits well, note its gauge, post length and placement in your phone. That's far more useful than trying to remember which one you bought last time.
If a healed piercing has a little extra room, a compatible spacer can take up some of that space. It doesn't physically shorten the post. Follow the spacer instructions, and have your piercer check the fit if you're unsure. For a healing or irritated piercing, get the post fitted rather than trying to fix it yourself.

How to put in a flat back
Getting a tiny front onto a tiny post can be fiddly. If you've got long nails or you're trying to reach your tragus, you'll know exactly what I mean. Give yourself a minute. This isn't a speed test.
These steps are for a fully healed piercing. If yours is new, sore or still healing, have your piercer change the jewelry.
- Wash and dry your hands. Start with clean jewelry and tools, good light and a closed sink drain.
- Unscrew the decorative front from the post.
- Gently guide the post through your piercing from behind your ear, so the flat back sits at the back.
- Hold the flat back steady. Finger cots or clean tweezers can help with grip; use a light touch so you don't scratch the gold.
- Line the front's threaded pin up straight with the opening in the post.
- Turn the front clockwise, looking at it from the front, until it feels snug.
It should screw in smoothly. If it catches or resists, stop, back it off and try lining it up again. Don't force the thread or use the front to squeeze your ear between the two ends.
If you use the kit's sticky tack to hold a small front, keep it on the decorative surface, away from the threaded pin and piercing, and remove any residue before wearing.
The little tool that makes it easier
Before I had a taper, getting my own flat backs in could be a whole event. A taper gives the post a guide to follow, which is especially helpful when you can't see the back of the piercing.
- For a healed piercing, gently pass a clean, compatible taper through from the front.
- Behind your ear, fit the tip of the taper into the open end of the flat back post.
- Keep them connected and gently guide the post forward through the piercing as the taper comes out at the front.
- Remove the taper and screw on the decorative front.
If it hurts or won't slide through easily, stop. A taper is a guide, not a reason to push harder or reopen a piercing yourself.
Our 2-piece taper set includes a straight and a curved guide, made from Grade 23 titanium for compatible 18G and 16G internally threaded flat backs and U hoops. Use the shape that gives you the easiest access to your placement, following the tool instructions.
A little help getting them in
Our Lazy Girl Jewelry® Kit brings the little helpers together, so you aren't trying to hold a diamond front with your fingernails over an open sink.

How to take a flat back out
- Wash and dry your hands.
- Hold the flat back still behind your ear.
- Turn the decorative front counterclockwise, looking at it from the front, until it unscrews.
- Gently slide the post out from behind your ear.
Dry fingers or a finger cot can help you grip it. If it won't budge, don't keep pulling or reach for household pliers. Your piercer can help loosen it without damaging the jewelry or your ear.
Keeping the front secure
A screw-on front can loosen with wear, so give it a gentle check regularly with clean, dry hands. Hold the back still and check that the front is snug. Don't overtighten it.
If your piercing is still healing, ask your piercer to show you how to check the fastening without rotating the post through the piercing. Tightening a loose end and twisting the whole earring are two different things.
Lazy Girl Jewelry®. Getting it in should be the easy part.
Where can you wear flat backs?
Lobes, upper lobes, helix, forward helix, conch and tragus can all suit flat backs. The right choice depends on your anatomy, piercing angle, gauge, post length and the shape of the front. A front that looks perfect in your lobe might be too big for your forward helix.
Keep a separate size for each placement. And if you're working out how the pieces fit together, that's where our Ear Architect styling guides come in.
A true rook usually needs a curved barbell, and a daith commonly wears a ring. Those need jewelry fitted to their anatomy. A faux rook is a different placement and can suit a flat back.

Living in them
I design earrings for the way I actually wear them: all day, all night. With a healed piercing, the right post length and a smooth front, a flat back can make that much more comfortable.
The front matters too. A flat back doesn't make a large or pointed design comfortable to sleep on. And no earring is a reason to sleep directly on a healing cartilage piercing. Keep pressure off it; a piercing pillow can help.
Our solid 14k gold flat backs are made for everyday wear. If your ears react to a particular metal, check the alloy as well as the gold content. Solid gold isn't a promise that every ear will tolerate it. Our guide to earrings for sensitive ears covers the metal question in full.
You still need to clean them. Obviously. For healed piercings, keep your earrings clean as part of your normal routine. For healing piercings, follow your piercer's aftercare advice: sterile saline wound wash, leave them alone, and avoid pressure.
Find your fit. Keep the front secure. Get on with your life.
The
FAQs
How many parts does a flat back have?
Two: the post with its flat back attached, and the decorative front. The flat back isn't a separate third piece.
What size flat back earring do I need?
Check both gauge and post length. As a guide, healed piercings start at 5 mm to 6.5 mm, and new or still-healing piercings take 8 mm to allow room for swelling. Your piercer can measure the fit.
Will an 18G flat back fit my piercing?
An 18G post is approximately 1.0 mm thick. It needs to match your piercing. If it meets resistance, stop and have your piercer check it.
How do I put in an Adornmonde flat back?
For a healed piercing, insert the post from behind your ear, hold the back still and gently screw the front in clockwise, looking at the earring from the front. A compatible taper can help guide the post through.
How do I loosen a stuck front?
Hold the back steady and turn the front counterclockwise, looking at it from the front. Try clean, dry fingers or a finger cot for grip. If it stays stuck, ask your piercer for help.
Can you sleep in flat back earrings?
They can be comfortable to sleep in once your piercing is healed, provided the post fits and the front is suitable. Don't sleep directly on healing cartilage, and don't ignore pain because an earring has a flat back.
Do flat backs need cleaning?
Yes. Leave-in jewelry still needs cleaning. Keep healed piercings and jewelry clean as part of your routine, and follow your piercer's instructions while a piercing is healing.